Spreader Bars

Regular price
$50.00
Regular price
Sale price
$50.00

AT A GLANCE

  • Spreader bars are designed to open the compressed paper chain pots so you can fill them with soil and seed them.
FREE SHIPPING OVER $100
FARMER TESTED
REQUIRED TOOL
BUILT TO LAST
The spreader bars are a required component of the paper pot system.  You can't use the paper chain pots without these.

THE PAPERPOT SYSTEM

Spreader Bars For Paper Chain Pots

Spreader bars are a required part of the paperpot system. They are designed to open the compressed paper chain pots, which you place onto a spreader frame and fill with soil. Remember to check out Spreader Frames, available separately, as they are another required component of the paperpot system.

What’s Included: Spreader Bars (1 Pair)

Modern Grower Spreader Bars are a new and improved iteration of the original Japanese version. They are made of high-quality steel and shaped more like rods (as opposed to bars). This new design is unbendable and designed to last. They have a pointed tip, which helps them slide into the paper chains with greater ease, and comfortable handles for better grip. Twisting the rods as you insert them into the tabs will help to avoid tearing the paper.

How To Use:

• Select the appropriate paper chain pot according to your desired crop spacing (2”, 4”, or 6”) and insert your spreader bars under the white paper tabs on either side of the paper chain, being careful not to tear the paper. Note: It does not matter how the writing on the paper chain pot faces—either way will work.

• With the spreader frame in front of you on your work surface, teeth facing up, pull apart the paper chain pot (like an accordion) using the spreader bars as handles. Keep pulling until the paper chain is approximately the width of the spreader frame.

• You’ll notice an offset tooth in one of the top corners of your spreader frame. Examine the honeycomb pattern in your stretched paper chain pot and reorient it (if necessary) so that the offset corner of the honeycomb lines up with the offset tooth of the frame.

• Start with one side and position the paper chain pot honeycomb cells over the teeth of the spreader frame. Every other row will be attached to the spreader frame. Note: If you are having trouble aligning the paper chain, it may not be stretched far enough; keeping the paper chain pot stretched the entire width of the frame will help the cells to line up correctly with the teeth.

• After the first side is successfully inserted into the teeth of the spreader frame, finish by placing the opposite side onto the frame as well, being careful to line up the cells appropriately with the teeth of the frame.

• After the paper chain pot has been successfully stretched and placed onto the frame, you can remove the spreader bars and set them aside.

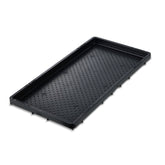
• Take an empty Paperpot germination tray, flip it upside down (holes up), and place it over the frame and the expanded paper chain.

• Holding both sides of the tray AND the spreader frame, flip everything right side up.

• Keeping the spreader frame in place, the tray can be filled with potting mix.

Frequently Asked Questions